Showing posts with label Recipes: Healthy. Show all posts

Wednesday, January 15, 2014

Strawberry Almond and Feta Salad


My all time favorite salad has to be this one.  I remember always seeing recipes for strawberry spinach salads and I just thought that was too weird . . . fruit with my lettuce, yuck!  Then, my sister made it at my baby shower and I couldn't get enough.  After trying out a few variations of this recipe, I finally perfected my favorite way of doing it, plus it's a little healthier, because I omit the sugar in the dressing and I don't candy my pecans or almonds.

Ingredients for 1 serving:
Salad
  • 1 handful of fresh spinach
  • 1 handful of favorite lettuce
  • 1 green onion, chopped
  • 1/2 Fuji apple, diced into large chunks (optional.  I just do this when I'm having it for lunch and to make it a little more filling)
  • 1 handful of strawberries, sliced
  • 1/4 cup sliced almonds, toasted (or pecans)
  • 1/8 cup feta cheese
Dressing (these measurements get small, because I had to reduce it down to one serving.  I usually quadruple this if it's for a large family size salad.)
  • 1/2 Tbsp.  sesame seeds, toasted
  • 1/8 cup olive oil
  • 1 Tbsp red wine vinegar
  • Pinch of paprika
  • 2 drops of Worcestershire sauce (approx. 1/16 of a teaspoon)
  • 1 strawberry
 
Combine all your salad ingredients in a bowl.  To make the dressing, combine all the ingredients EXCEPT for the sesame seeds in a blender or magic bullet.  Blend until smooth.  Add the sesame seeds and pour over salad.


 This is such a filling salad, I don't even miss my breads or pastas.  Enjoy!

Thursday, October 10, 2013

Macaroni and "Cauliflower" Cheese

Macaroni and Cheese is pretty much every kids favorite, so when I want to try and sneak in a few vegetables for the day, I always turn to this delicious dish.
 

I originally got a Green Mac and Cheese recipe off of weelicious.com.  It's really tasty, but it definitely is more like Broccoli Mac and Cheese.  So, I tweaked the recipe so that it had a more basic Mac and Cheese flavor with hidden cauliflower.  Then, I added mushrooms and peas, just because we like eating it that way.
 
 
Here are the ingredients I used:
  • 10 oz noodles (I used Tirali noodles, just to change it up.  Jumbo twisted elbow noodles are always fun too.)
  • 1 3/4 cups whole milk
  • 1 cup cauliflower, chopped into large chunks
  • 2 Tbsp margarine or butter
  • 1 Tbsp flour
  • 2 cup sharp cheddar cheese, shredded
  • 1/8 cup Gruyere cheese, shredded
  • 1/2 cup frozen peas
  • 1/4 cup mushrooms, diced small (if you are trying to hide it)
  • Salt and pepper to taste

Directions:
  1. Cook pasta. 
  2. While the pasta is cooking, put your cauliflower in a microwavable safe bowl and cover with some water.  Microwave for 3 minutes on high.  Drain the water and place in magic bullet/food processor.  Add the milk.  Blend until smooth. 
  3. In a large pot, melt the butter.  Stir in the flour until smooth.  Slowly add the milk/cauliflower mixture and mushrooms.  Bring to a slight boil and reduce to a simmer until the sauce begins to thicken.
  4. Drain the pasta.  Add the pasta, gruyere cheese, and peas to the sauce.  Stir and heat through.

 
Even if you don't like cauliflower, you should try this.  The cheese flavor is so strong, you can't even taste it.  Be brave . . . I'm talking to you Donna :)

Wednesday, October 9, 2013

Green Peanut Butter Banana Smoothie


I'm always trying to think of ways to feed Dustin more veggies.  A great way is through is fruity drinks.  He loves juice and smoothies.  So, for his mid-morning snack we experimented with a peanut butter, chocolate, banana, and SPINACH smoothie.


Here is what we did:
  • 1 banana
  • 2 Tbsp chocolate whey protein powder
  • 1 Tbsp PB2 (I ordered mine, but you can find it in some stores and most GNCs)
  • 1 cup skim milk or unsweetened almond milk
  • 1/3 cup torn spinach (lightly packed)
Put all the ingredients in a magic bullet or blender.  Puree until liquefied.

 
I came on here right after making the smoothie so I could remember what we put in it.  He was done drinking the entire thing before I wrote "1Tbsp chocolate whey protein powder".


If you're not a big spinach fan, start off with a little less spinach at first or add extra protein powder or PB2.  

Granola Bars with a Hidden Vegetable

Dustin has been really into granola bars lately, but it's hard to find one without too much sugar or unnatural ingredients.  So I tried out a new recipe from this site:  http://www.ifood.tv/recipe/healthy-seed-n-nuts-carrot-cake-granola-bars
 
I made a few changes because I really wanted to make a granola bar with a combination of oats and blueberries.  I read in Mens Fitness that when adding blueberries (which contain a lot of vitamin C) to the phytochemicals in oats, it takes longer for oxidation to take place in LDL . . . whatever that means.  LDL is bad cholesterol and when oxidized, can increase your risk of having a stroke or heart attack. 
 
Now that you have your fun fact for the day, here's how I adapted this recipe.


In a magic bullet (or food processor), I added 5 Tbsp dried Blueberry flavored cranberries.  I went to buy dried blueberries and the only kind they had contained corn syrup.  If I can find some without I definitely want to try that next time.  The blueberry flavored cranberries still has added sugar, but it also has blueberry juice in it.  Plus, cranberries contain Vitamin C as well.


Then, I added 2 Tbsp Pecans (or walnuts), 6 Tbsp whole grain oats, and 2 Tbsp Plain Almonds.  Blend.


I overly blended mine since these were for Dustin, but you could leave it a little chunkier.


If your using  magic bullet, use the blade on the right.  I didn't read my manual and always try using the one on the left (which does not work for grinding almonds).


Transfer mixture to a medium size bowl and add 3 Tbsp sunflower seeds, 1/4 tsp cinnamon, 3 Tbsp wheat germ, 1 Tbsp honey, and 1 Tbsp ground flax.


Peel and then grate 6 Tbsp Zucchini.   I used the smaller grater.  I didn't squeeze out the juice and our granola bars ended up real moist and soft.  If you don't want that, try squeezing out the juice.


Add 1/2 tsp vanilla.  Mix well.

 
Spray a small baking dish with non-stick cooking spray and flatten the granola into the pan with your hands.


To get it even smoother on top, I use a large spatula and press down.


Bake at 325 for 30 minutes.  Let cool and cut.


Wrap in plastic and place in the refrigerator until ready to be eaten. 

Here is the recipe again:

Ingredients
  • 5 Tbsp dried blueberry flavored cranberries
  • 2 Tbsp pecans or walnuts
  • 2Tbsp almonds
  • 3 Tbsp sunflower seeds
  • 6 Tbsp zucchini, peeled and grated
  • 1/4 tsp cinnamon
  • 1/2 tsp vanilla extract
  • 6 Tbsp whole grain oats
  • 3 Tbsp wheat bran
  • 1 Tbsp ground flax
  • 1 Tbsp honey
Directions:
  1. Blend the cranberries, pecans, almonds, and oats.  Transfer to a medium bowl.
  2. Add the sunflower seeds, zucchini, cinnamon, vanilla extract, wheat bran, ground flax, and honey.  Mix well.
  3. Pour into a small baking dish that has been sprayed with non-stick cooking spray.
  4. Flatten with hands and then a spatula to get it extra smooth.
  5. Bake at 325 for30 minutes.  Let cool and then cut into serving sizes.
  6. Enjoy!
 
Kid Approved

Tuesday, March 19, 2013

Breakfast Sausage Balls

I try to get most of our breakfasts for the week cooked on Sundays and I especially like to make things that are easy to take on the go since my husband has to go to class in the mornings.  I saw a picture of these sausage balls and thought I try them out. 

Ingredients:
  • 2 eggs
  • 56g turkey sausage, divided in half
  • Non-stick spray
Directions:
  1. I first boiled my eggs in salt water for about 8 minutes.  Let them cool so you can use your hands to work with them.  Peel the eggs.
  2. Take 28g of turkey sausage and form into a ball.  Flatten as thin as you can and drape over the egg.  Carefully press turkey sausage around the egg and try to patch up any holes.  Because the sausage is a little greasy, you really have to work with it to get it to stick around the egg, but keep at it and it will work.  Repeat for as many eggs as you want.
  3. Line a casserole dish with tinfoil.  Spray with non-stick spray.  Place the sausage balls into the casserole dish and cover with tinfoil.
  4. Bake at 350 for about 20 minutes or until the sausage is cooked.  Flip the sausage balls over halfway through. 
  5. Enjoy your low-carb breakfast!  (We usually eat the egg yolk for one, but then pick out the other yolk and just eat the turkey sausage and egg whites to reduce the fat.)

Low-Carb Cauliflower Pizza

My husband and I have decided to go on a low-carb "lifestlye" change.  We are following one diet that keeps their carbs under 30g a day, which is not very much considering how much bread and pasta we use to eat.  This has forced us to get a little bit more daring and try new recipes, thus PINTEREST becomes our life saver!  I kept seeing these cauliflower pizza dough recipes and was a little curious.  So, we finally tried it out last Friday and it was D-E-L-I-C-I-O-U-S!!!  My husband, Dylan, went as far as to say "it is better than a Papa Johns Pizza" . . . I'm not going to completely agree with that statement, but it was pretty good. 


I used the recipe from the website Eating Bird Food at http://www.eatingbirdfood.com/2012/09/healthy-pizza-with-a-cauliflower-crust/
I only made one adjustment and that was to add 2 Tbsp ground Flaxseed.  I was hoping it would help the dough stick together a little more and it would add some more nutrients.  Also, all the carbs in ground Flaxseed are dietary fiber, so my husband and I don't count those.  Here's the recipe, but again you can also go to their site to find more pictures.

Ingredients:
  • 2 cups raw cauliflower, blended
  • 1 garlic clove, minced
  • 1 cup mozzarella, low-sodium
  • 1 egg, beaten
  • 1 tsp oregano
  • 1 tsp basil
  • 2 Tbsp ground Flaxseed
  • Non-stick spray
Directions:
  1. In a large skillet, saute the cauliflower on low-medium until translucent.  About 8 minutes.  Let cool.  (Makes it easier to work with your hands)
  2. In a large mixing bowl, combine the rest of the ingredients.  Add the cauliflower to the mixture.  Use your hands to really mix in the ingredients and form a ball.
  3. Cover a pizza pan with tinfoil and spray with non-stick spray.  Place the dough in the middle of the pan and slowly start to flatten into a crust shape.  (It took me awhile to really work the cauliflower into the right shape and patch up all the holes that kept forming, but it did end up working.  I pressed the dough down to about 1/4" thick and pinched the edge up so hold in the ingredients.)
  4. Bake at 400 for about 25-27 minutes or until golden.  Turn your pan at the halfway point.
  5. Top with your favorite sauce, meat, and veggies.  (Don't over do it though, because the crust is not that thick and won't be able to hold the weight.) 
  6. Broil for about 5 minutes or until the cheese is melted.  (Because you only cook it for a few minutes longer, I sauted my veggies and precooked the chicken before putting it on top of the pizza.)
It's packed with so much flavor because of the herbs and cheese, you can't even taste the cauliflower.  I couldn't at least, but I like cauliflower too.  Be daring and try this recipe!

Sunday, May 20, 2012

Vegan Chickpea Peanut Butter Cookies

I love sweets so much, but I hate how unhealthy they are for you.  So I've been on a hunt for great dessert recipes and then alter them slightly to make them a little healthier.

I've seen a lot of recipes that call for beans in their desserts and thought it was the grossest sounding thing ever, until I finally got the courage to try black bean brownies . . . delicious.

When I decided to take a peanut butter cookie recipe and make it healthier, I got gutsy and substituted the butter for chickpeas.  If you've ever had hummus, the chickpeas have a real nutty flavor, which would go perfectly with a peanut butter cookie!

Anywho, here's the recipe.  Get brave and give it a try! 

Ingredients:
  • 1 cup whole wheat pastry flour
  • 1/4 cup oat flour
  • 1/4 cup almond flour
  • 1/4 cup ground flax seed
  • Heaping 1/2 tsp salt
  • 1 tsp baking soda
  • 1/2 cup chickpeas, cooked and mashed (I put mine in the food processor)
    • If this scares you too much, substitute 1/4 cup out with Smart Balance Lite margarine which is dairy free
  • 1/2 cup coconut sugar or raw cane sugar
  • 1/2 cup honey  
    • (If you like a real honey flavor, swap out the coconut sugar and just use a whole cup of honey)
  • 1 egg Replacer 
    • (I like to use Bob's Red Mill Egg Replacer.  You use one tablespoon of the powder mixed with three tablespoons of water.)
  • 1 1/2 tsp vanilla
  • 2 Tbsp almond milk
  • 3/4 cup homemade peanut butter or natural peanut butter
  • 1/2 tsp butter flavor extract - Optional 
    • (If you do add margarine, you probably don't need this or just use 1/4 tsp of it

Directions:
  1. Preheat the oven to 350 degrees.
  2. In a large bowl, mix together all the dry ingredients.  
  3. In a separate bowl, mix together all the wet ingredients.  Add the wet ingredients to the dry ingredients.  Mix well.
  4. If the cookie dough is too sticky to work with, place it in the fridge for about half an hour.
  5. Scoop out about 2 tablespoons of cookie dough at a time and roll into a ball.  To prevent from sticking to your hands, have a bowl of water set aside and get your hands damp before working with the dough.  Place the balls onto an ungreased cookie sheet a few inches apart.  Use a fork, dip it in water first, and flatten the cookies using a criss-cross motion.  
  6. Bake for about 15-20 minutes.  (Warning:  I live in a higher altitude, so check your cookies at maybe 10 minutes first.  You want them to get golden and the centers to be set.)
  7. Let cool and serve to your friends without telling them there's chickpeas in it (unless they have an allergy) . . . they'll never know!

Wednesday, April 4, 2012

Chicken and Barley Soup with Leeks

My mother-in law wasn't feeling good yesterday, so we decided soup would be the most comforting thing for supper instead of Korean food, which is what I'm going to cook tonight.  

We had two leftover leeks from the night before and chicken, so I went on an internet search for a chicken leek soup . . . and I found a few that sounded really tasty!  This is the site I got the recipe from, but then I altered it based on what we had and by taste: http://tastykitchen.com/recipes/soups/chicken-barley-soup-with-leeks-and-mushrooms/  
 Here's what you'll need:
  • 3 boneless chicken breasts (I want to try this with a whole chicken next time.  Then you wouldn't have to buy chicken broth.  Just simmer it all day)
  • 1 Tbsp Olive Oil
  • 1 Tbsp Margarine (I used dairy-free margarine)
  • 10 cups chicken broth (low sodium)
  • 2 celery stalks, sliced
  • 4 carrots, sliced
  • 8 ounce mushrooms, sliced
  • 2 bay leaves
  • 1 tsp thyme
  • 1 tsp pepper (start off with 1/2 tsp if you don't love pepper like I do)
  • 1/2 tsp salt
  • 2 whole leeks, diced
  • 1 cup pearled barley, uncooked
Get your dutch oven out or a big pot and melt the butter in the oil on medium/high.  Brown the chicken breasts.  (I used two chicken breasts and two small thighs, because that was all I had) 
 Pour in 10 cups of chicken broth.  Cover and let simmer on low for 45 minutes to an hour.
 While the chicken was cooking, I got the rest of my ingredients together.  That way, when Dustin woke up from his nap, I could easily pour everything into the pot without having to worry about chopping anything.
 After 45 minutes to an hour, pour in the mushrooms, celery, carrots, and seasoings.  Cover and simmer for anoter 45 minutes or until the chicken is done.
Remove the chicken and shred with two forks. Cover and keep warm.
Add the leeks and barley.  Simmer for 45 minutes or until the barley is nice and soft.
Stir the chicken back into the soup, turn off the stove, cover, and let stand for 10 minutes.  This will help the juices soak back into the meat . . . and it will help cool the soup down.
Serve with some crackers and enjoy a very filling, comforting meal! . . . This makes a lot, so there will be plenty for leftovers too!

Sunday, April 1, 2012

Sun Butter

I am obsessed with peanut butter. I love it in cookies, on bread, in a smoothie, you name it! So it only makes sense that my son would be showing signs of sensitivty to all nuts while I'm nursing. I started looking up alternatives for peanut butter and found that you could make a sun butter out of sunflower seeds. Even though they probably aren't going to be making an reese sun butter cups any time soon, this will have to do for now until our son (hopefully) grows out of his allergies.

I've also read that sun butter has 1/3 the saturated fats compared to peanut butter and has more nutrients, especiall fiber.So, this is what you'll need:
  • Sunflower seeds, say WHAT . . . I know, who would have guessed. I used 2 cups of unsalted, unroasted sunflower seeds for this recipe.
  • 1/2 tsp salt
  • 1/2 tsp sugar
  • 1-2 Tbsp canola oil
  • 1-2 tsp honey (optional) I didn't add this to mine because I thought I may not always want the honey flavor, but if you do choose to put it in there, it is really yummy! Probably don't need the sugar if you put 2 tsp of honey in it.
Toast the sunflower seeds in the oven for 15-20 minutes at 350 degrees. You don't want them to change color too much, because that will make them too dry. I did it enough to get that roasted flavor.Put the sunflower seeds, sugar, and salt in a food processor. Process for about 5 minutes. Scrap the bowl every now and then.This is what mine looked like after 5 minutes. It'll start getting a little moist and start sticking together. Now you can add the oil. Add 1 Tablespoon at a time. Blend for another 3-5 minutes, or until your sun butter is the consistency you prefer.

Find a nice mason jar to store your sun butter in and keep refrigerated. I'm not sure how long this will last. I probably wont eat it too fast, so I'll keep an eye on it.

Wednesday, March 28, 2012

Yummy Hummus

I was never too much of a chickpea fan until recently and man am I glad I like them now, because what would I do without hummus! I adjusted this recipe after looking at Emeril's version and another from the Moosewood cookbook. Separate they are okay recipes, but combined and tweeked, it makes one delicious combo! Give it a try. Get all of your ingredients together:
  • 3 cups cooked chickpeas, rinsed and drained (my mother-in law buys dried chickpeas and slow cooks them all day in water. This is much better than using the canned ones, no added sodium or perservatives.)
  • 3 Tbsp Tahini paste
  • 2 lemons, squeezed
  • 2-3 Tbsp garlic (I use three, but if you don't want your breath smelling like garlic, maybe just use two)
  • 1/4 cup fresh parsley leaves
  • 1/3 cup olive oil
  • Dash of cayanne, optionalPut all the ingredients in the food processor except for the olive oil. Start to blend. Slowly poor in the oil through the top as it is blending. Continue to add the olive oil until it is at the consistency you prefer. Stop every now and then to scrap the sidesof the container. Blend until nice and smooth.Put the hummus in your favorite dish, drizzle a little olive oil on top and serve with some lemon wedges, pita chips, veggies, whatever you prefer.

Wednesday, March 21, 2012

Vegetable and Turkey Tomato Soup

It finally snowed here a few days ago, so what better way to celebrate that than with a healthy and comforting soup simmering on the stove all day. I got this recipe off of Allrecipes.com, but made a few adjustments and I have to say it is quite tasty and easy!
I made this in a Dutch oven, but you can definitely cook this in a regular pot or a slow cooker. Here's what you'll need (and you can vary up any veggies to your liking):
  • 1lb of ground turkey or chicken, 93/7 if possible
  • 1tsp olive oil (optional)
  • 1 cup onion, chopped
  • 3 cloves garlic, minced
  • 1 1/2 celery stalks, chopped
  • 1 cup carrots, chopped
  • 1 (14.5oz) can diced tomatoes
  • 1 (28oz) can tomato sauce
  • 2 (14.5oz) can kidney beans
  • 4 cups of beef broth, reduced sodium
  • 1 1/2 tsp dried parsley
  • 1 1/2 tsp dried basil
  • 1 1/2 tsp dried oregano
  • 1 bay leaf
  • 1/2 tsp pepper
  • 1/8 tsp nutmeg
  • 1/8 tsp celery salt
  • 1/4 tsp cayenne pepper (optional)
  • 3 cups cabbage, chopped
  • 1 cup frozen corn
  • 1 (15oz) can of green beans, drained
  • 1 cup uncooked macaroni, rotini (your favorite pasta noodle pretty much)

Once you get all that stuff together, the hard part is over! Start off by browning your meat in the dutch oven. You may need to add a little bit of oil if you got the lean meat and it is sticking to the pot. Next, put the oven on medium heat and throw in the onions, garlic, celery, carrots, diced tomatoes, tomato sauce, kidney beans, and beef broth. Stir.Add the parsley, basil, oregano, bay leaf, pepper, nutmeg, celery salt, and cayenne. Mix well. Bring the pot to a boil and then reduce down to a very light simmer. Simmer for 4 hours or until the carrots are soft.Add the cabbage, frozen corn, green beans, and uncooked pasta noodles. Simmer for another 45 minutes to an hour, or until the pasta and cabbage are cooked.Remove from heat, get in your footie pajamas, and serve with a buttery (dairy-free) piece of bread.

Monday, March 19, 2012

Vegan Chocolate Cake-Batter Milkshake


I tried the healthy chocolate cake-batter milkshake off of Chocolate Covered Katie's website and thought it was pretty good. The flavors were really yummy, didn't taste at all like a vegan shake, and you don't need to add any sugar! The only negative I would have to say is that it didn't taste like cake-batter.
That being said, Katie did state on her site that she had never had cake-batter flavored ice cream. So I'm probably comparing it too much to the store bought kind.
Overall, a tasty and healthy treat to try. Just go to her website:


Homemade Coconut Oil

My mother-in law loves to use coconut oil when cooking and it does wonders for my 3 month old sons cradle cap. The only bad thing about coconut oil is it's kind of pricey. So I went on an internet search to learn how to make my own coconut oil. The process is actually pretty simple, just a little time consuming. Here's what you'll need:
  • A coconut and some water. Yup, that's it!

I started off with two coconuts, but ended up with only one in the end . . . you'll see why if you scroll down and read a little further. I found coconuts for 1.99 each at Albertsons, which is kind of a more pricey grocery store. They are probably cheaper at Wal-mart.

The first thing you need to do is get a manly man to pierce the black eye and drain the coconut water. Then he'll need to crack open the coconut so the meat is exposed.
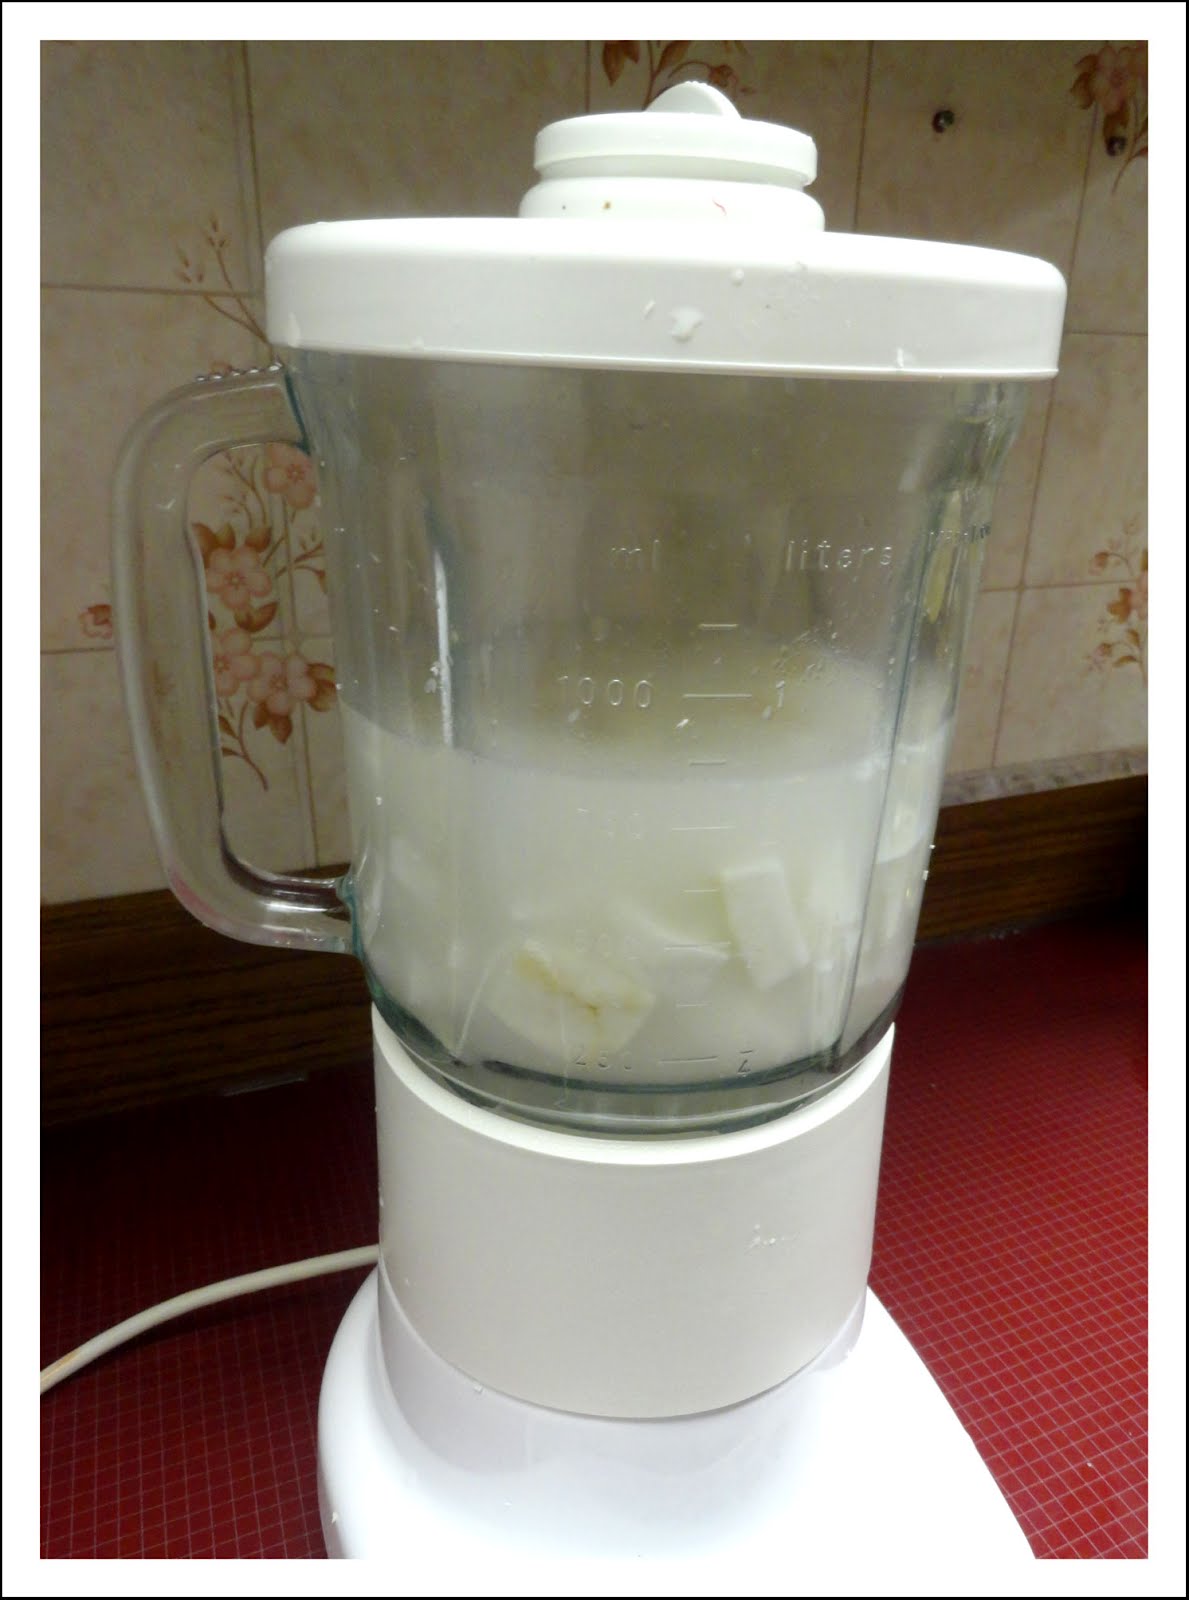
Next, cut the coconut meat out of the shell and cut into small chunks. We used a small knife, but haven't figured out any easier way to do this yet.

Put the coconut into a blender with some water. For every 1 cup of coconut, use 1 1/2 cups of water. Do this in small batches and not all at once. Blend until the coconut is liquidy.

*Blooper Alert* Don't pull an idiot move like me and unscrew the bottom of the blender and spill all of the coconut puree all over the floor and yourself . . . This is where that second coconut went.
Okay, now we are down to one coconut. Line a large bowl with three pieces of cheesecloth. Pour the coconut/water puree two cups at a time onto the cheesecloth.
Squeeze out the liquid as much as possible. You can always redunk the cheesecloth into the bowl to get the coconut wet again and try to squeeze out more of the oils.
Repeat this until all the liquid is squeezed out of the coconut puree.
Pour the coconut milk into a clear pitcher or container, preferrably with lid. Cover and let stand in a darker area of the room for two days.
The coconut cream/oil will separate and float above the liquid after it is done fermenting. Put the pitcher in the fridge for about 4-6 hours or until the cream/oil has hardened.
Cut around the edges of the top layer to loosen the cream/oil out of the container.
Remove the top layer from the container. Now we need to separate the oil from the cream.
Place it in a skillet and turn the heat to medium/high.
Constantly stir as the cream/oil melts and begins to boil.
You'll start to see the oil separate from the cream. The oil is all the clear liquid.
Keep stirring, you're almost done!
When the cream has solidified and turned golden brown, you are done.
Pour the contents of the pan through a sieve and into a jar.
Let cool at room temperature and enjoy all your hard work!